3 Most common Concrete/ Cement Floor Crack Repair Guide
- 9 Reno Pte Ltd
- Jun, 07, 2024
- Painting, Waterproofing
- No Comments.

Cracked concrete floors can be a significant concern for landlords and homeowners alike. Not only do they detract from the aesthetic appeal of your property, but they can also indicate more severe structural issues. Fortunately, with the right knowledge and tools, you can effectively address these problems and restore your floor to its original condition. This guide will walk you through the essential steps of concrete floor crack repair, cement floor resurfacing, and handling structural repairs.

Concrete Floor Crack Repair: Essential Steps for Landlords and Homeowners
Understanding Concrete Cracks
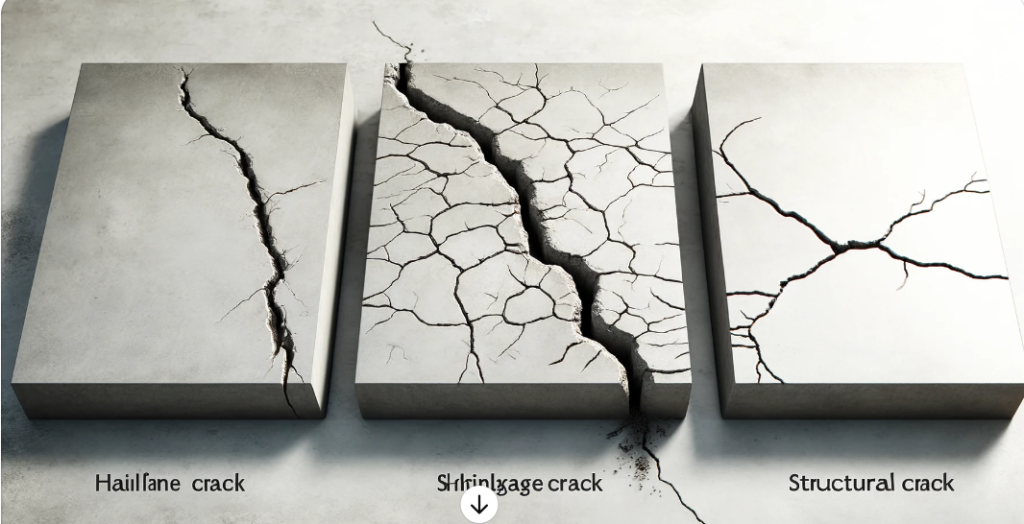
Before diving into repair methods, it’s crucial to identify the types of cracks you’re dealing with:
- Hairline Cracks: Small, superficial cracks that are generally not a structural concern.
- Shrinkage Cracks: These appear as the concrete dries and loses moisture.
- Settlement Cracks: Caused by shifting ground beneath the concrete.
- Structural Cracks: Larger cracks that may indicate deeper issues within the structure.
Necessary Tools and Materials
To repair concrete cracks effectively, gather the following tools and materials:
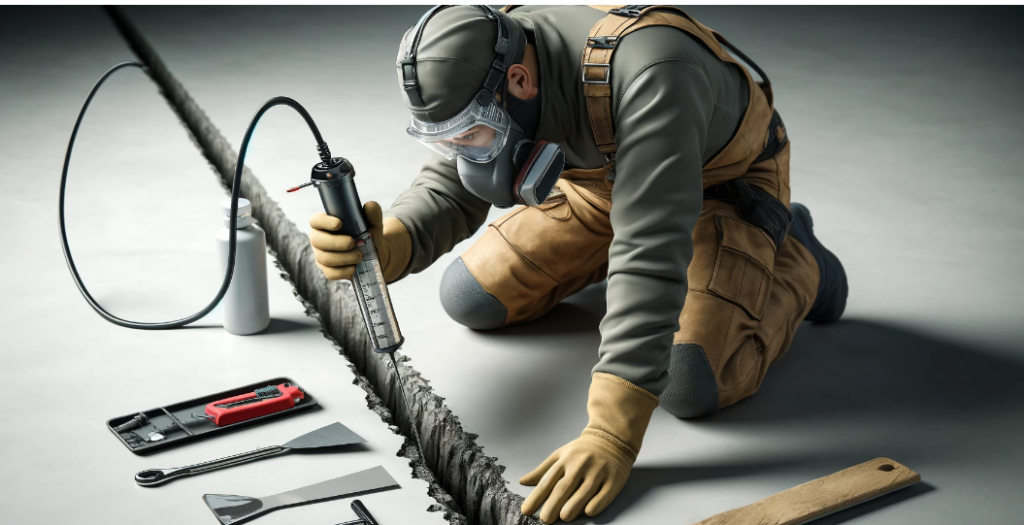
- Epoxy Injection Kit: Ideal for deep, narrow cracks.
- Polyurethane Foam: Suitable for filling and sealing wider cracks.
- Concrete Overlays: For resurfacing and restoring the floor’s appearance.
- Crack Chaser Blade: Used to clean and widen cracks.
- Concrete Cleaner: Essential for preparing the surface.
- Protective Gear: Safety goggles, gloves, and masks.
Step-by-Step Repair Process
Step 1: Clean the Area
Start by thoroughly cleaning the cracked area. Use a concrete cleaner to remove dirt, oil, and debris, ensuring a clean surface for better adhesion.
Step 2: Widen the Crack
Use a crack chaser blade to widen the crack slightly. This allows the repair material to penetrate deeper and form a stronger bond.
Step 3: Apply the Repair Material
Select the appropriate repair material based on the type of crack:
Epoxy Injection: ( option1 )
- Mix the epoxy as per the manufacturer’s instructions.
- Inject the epoxy into the crack using the provided nozzle.
- Smooth the epoxy with a putty knife and allow it to cure.
Polyurethane Foam: ( option 2)
- Attach the foam nozzle to the crack.
- Slowly inject the foam until it begins to seep out.
- Trim any excess foam once it has cured.
Step 4: Apply a Concrete Overlay (Optional)
If desired, apply a concrete overlay to give the floor a uniform appearance:
- Mix the overlay according to the instructions.
- Pour it over the repaired area and smooth it out with a trowel.
- Allow it to cure completely before using the floor.
Cement Floor Resurfacing: Enhancing Durability and Aesthetics
Resurfacing your cement floor can significantly improve its look and extend its lifespan. Your cement floor surface is cracks, pop holes, exposed the sandy based etc. Here’s how to do it:
Why Resurface?
- Improved Aesthetics: Resurfacing removes stains and discoloration.
- Enhanced Durability: A new surface layer can protect the underlying concrete.
- Increased Safety: Smoother surfaces reduce the risk of tripping.
Resurfacing Process
Step 1: Surface Preparation
Clean the floor thoroughly with a pressure washer. For stubborn stains, use a concrete cleaner.
Step 2: Repair Cracks and Holes
Ensure all cracks and holes are repaired before resurfacing. Follow the steps outlined in the crack repair section above.
Step 3: Mix and Apply the Resurfacer
Mix the resurfacing compound according to the manufacturer’s instructions. Pour it over the floor and spread it evenly with a squeegee.
Step 4: Add Texture (Optional)
For a textured finish, use a broom to create patterns in the wet resurfacer. This enhances the floor’s appearance and adds slip resistance.
Step 5: Curing
Allow the resurfacer to cure fully before using the floor. This may take several hours to a few days, depending on the product.

Link : Hairline crack on cement floor
Structural Repair: Addressing Serious Concrete Issues
For significant structural concerns, more intensive repair methods are necessary. Here’s how to handle them:
Identifying Structural Damage
Look for these signs of structural issues:
- Wide Cracks: Cracks wider than 1/4 inch.
- Uneven Floors: Noticeable dips or slopes in the flooring.
- Separation from Walls: Gaps between the floor and the walls.
Structural Repair Techniques
Slab Jacking
Slab jacking involves injecting a grout mixture beneath the slab to lift it back into place. This technique is often used for settling issues where the concrete has sunk unevenly.
Technical Steps:
- Drilling Holes: Drill small, strategically placed holes in the affected area.
- Injecting Grout: Pump a grout mixture (often a slurry of cement, sand, and water) into the holes. The pressure lifts the slab back into its original position.
- Sealing Holes: Once the slab is level, fill the drilled holes with concrete to finish the repair.
Steel Reinforcement
Steel reinforcement is used when there’s a need to add structural integrity to compromised concrete. This technique involves inserting steel rods or mesh into the concrete to prevent further cracking and ensure stability.
Technical Steps:
- Cleaning and Preparation: Clean and prep the crack by removing any loose debris.
- Inserting Steel Rods: Insert steel rods or mesh into the crack, ensuring they are securely anchored in the concrete.
- Applying Epoxy or Concrete: Fill the crack with epoxy or a concrete mix to bond the steel reinforcement and the existing concrete.
Fiber Reinforcement
Fiber reinforcement strengthens concrete without the need for heavy machinery. It involves applying a bonding agent and fiber reinforcement tape to the crack, followed by a concrete patch.
Technical Steps:
- Surface Cleaning: Clean the crack and the surrounding area thoroughly.
- Applying Bonding Agent: Apply a bonding agent to the crack to ensure a strong adhesion.
- Pressing Fiber Tape: Press fiber reinforcement tape into the bonding agent.
- Covering with Concrete: Cover the tape with a concrete patching compound and smooth it out.
Engage a Licensed and Experienced Specialist
While minor repairs can often be handled by knowledgeable homeowners, structural repairs require the expertise of licensed and experienced professionals. A specialist can accurately diagnose the underlying issues, ensure compliance with safety standards, and use advanced techniques and materials to achieve long-lasting results.
Why Hire a Professional?
- Accurate Diagnosis: Professionals can identify the root cause of structural problems.
- Safety: Ensures repairs are done safely and meet all regulatory standards.
- Quality Workmanship: Access to high-quality materials and advanced techniques.
- Peace of Mind: Confidence that the repair will be durable and effective.
Conclusion: Take Charge of Your Concrete Repairs
By following these guidelines, landlords and homeowners can confidently address concrete floor issues, enhancing both the safety and appearance of their properties. Whether you’re dealing with minor cracks or significant structural concerns, having a clear action plan and the right tools at your disposal makes all the difference.
For those who prefer professional assistance, don’t hesitate to reach out to concrete repair experts. Ensuring a flawless floor is an investment in your property’s long-term value and appeal.
Need professional advice or services? Contact us today to schedule a consultation. We’re here to help with all your concrete repair needs.
Contact 9reno.com Repair Specialist
Get the latest update and video from the channel
Contact Us
[Contact_Form_Builder id=”2″]
About 9 Reno Pte Ltd
Recent Blogs
- Bathroom
- Building Matters
- Construction Related
- Fireproofing
- General
- Painting
- Plastering work
- Reinstatement work
- Renovation Related
- Repair & Replace
- Waterproofing
- Wet Work
- Window & Door
We are Bizsafe certified
We are BCA Registered Contractor
Blog
- 🏢 Spalling Concrete Repair at HDB Shop in Jurong West – The Best Solution for a Safe & Lasting Fix in Singapore
- Window Frame Leaking During Heavy Rain? Here’s How to Fix It in Singapore
- Transform Your Home: Expert Tips to Repair Pop-Up and Debonded Floor Tiles & Kitchen Flooring
- How to Repair Holes and Repaint Old Windows During Renovation in Singapore
- 🛁 Rusty Bathtub? Here’s Why It Happens (And How to Fix It in Singapore!)


